Tuesday, July 9, 2013

Lightroom Class#1 Review


Howdy

Welcome to the Clark College Lightroom Class.

This is a review of the class discussion with web links.

Generally the Lightroom Primer website has detailed notes covering class material and discussions. If details need to be added you will find them in these class review notes, or I will update the website.  

To contact me reply to this e-mail or add my email address to your contacts from this e-mail.

The Lightroom Primer website is http://uofgts.com/Lightroom/index.html

Before You begin using Lightroom

1. Calibrate your Monitor


At the bare minimum you should make sure that you set the Brightness and Contrast of your monitor.

For details go to this web page Calibrating Your Monitor


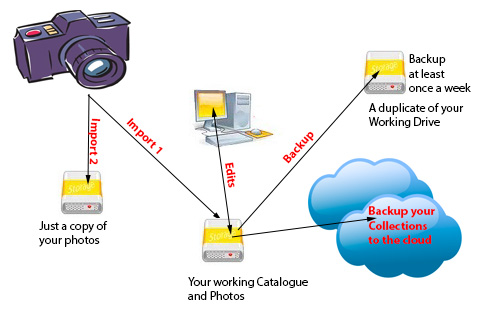
2. Establish a plan to backup your Photographs

Backup Scheme

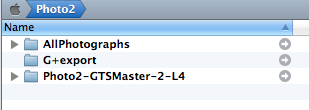
The Structure of your Main Photo hard drive and the backup hard drive should look like this, Your backup drive would have a different name

Layout001

The folders are at the "root" of the Hard drives

3. Fill out and save your IPTC Metadata Preset

In Lightroom

(In Photoshop, you would fill out the IPTC Metatdata form available in the program "Bridge")

Menu item:
Metadata > Edit Metadata Presets…

If you want to learn more about IPTC (International Press Communications Council) Metadata check out their website

Here are two excellent videos 

How Lightroom works… A video by George Jardine (This should be required viewing for ALL Lightroom users. )


And here is a video on how to use the Filter bar  http://mulita.com/training/sample-lib4/, A Free sample Movie by George Jardine

It's a really REALLY good tutorial on how to use the Filter Bar.


That should do it for now… If you have a question… 'holler
 

Tuesday, May 21, 2013

Lightroom, Class#2 Review

More iPhoto to Lightroom

I found a nifty little program called iPhoto To Disk

 Not only can you see the photos

Layout009

You can export them to a new location!

Layout010 

The trial version lets you export 50 files… The full version is $12.95

Remember, no matter what program you use, your Photos are on somewhere on a Hard Drive, They are never "in" the program or tied to a specific program.  They are, after all YOUR photos, Not Apple's… Got that Apple???

How to "kill" The annoying Photo Down Load requester popup

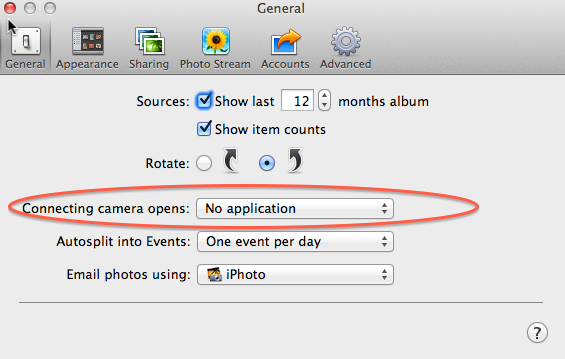
Yep, the toggle is a Preference!

iPhoto Menu: Iphoto > Preferences > General Tab


Layout007


In Lightroom Preferences, General Tab, uncheck "Show import dialogue when a memory card detected…

Layout008

Other programs?  Look in their preferences!

The Develop Module

Link: Select the Tab Develop

Note that the Exposure slider now does Exposure and Brightness. 

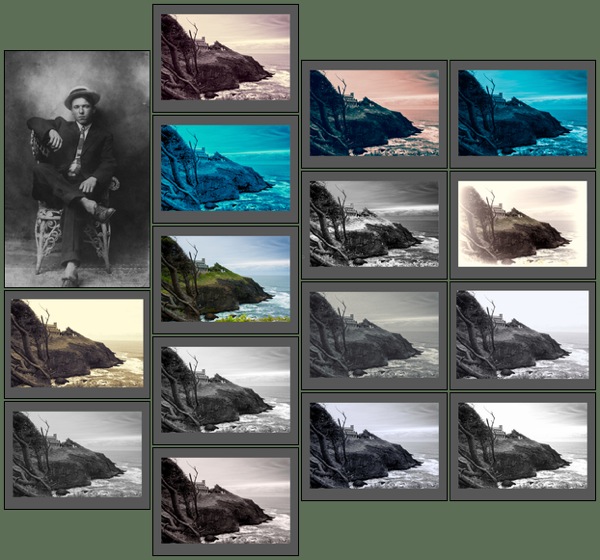
 For different processing views of Rocky Creek Check out The Rocky Creek Collection at my Revel site

As an aside, the Develop Module allows a 32 bit pipeline, so now you can use a program like Photoshop to stack HDR images and export the 32 bit files for Develop processing in Lightroom… You can see an example at the Revel site


Soft Proofing Notes

Select the Softproof Tab in the "output" web page


  Got a question? Send an e-mail, I'll let you know if/when the class continues.


Importing your iPhotos into Lightroom

Finding your iPhoto Photographs

iPhoto imports your pictures into a folder named "Originals".  When you edit an Original picture in iPhoto it makes a copy of the edited photo and saves it with the changes in a folder called "Modified". So, you make have 2 copies of a photo, it you made changes to it in iPhoto!
 
(Note): 
Apple changed the behaviour of the iPhoto Library folder after iPhoto version 6? or so…  just clicking on the iPhoto Library folder won't open it. You NOW have to right click on the folder and choose "Show Package Contents"
 
On your Mac the path to the Originals and Modified Folder should be 
/Users/Username/Pictures/iPhoto Library/Originals
 

Easy Access to the "Originals and Modified Folders

Navigate in the finder to the iPhoto Library

path is .../Users/Username/Pictures/iPhoto Library

Right click on the "iPhoto Library" folder and choose 
"Show Package Contents"
You should now see the Originals and Modified folders
Right Click on the Originals Folder and choose the menu item "Make Alias"

Now drag the aliased folder to your Pictures Folder (Or where ever you want them)
Do the same for the "Modified" folder
Now you can use  Lightroom  or any other program to"see" your Photographs! 
 

Moving Your iPhoto Photographs.

 
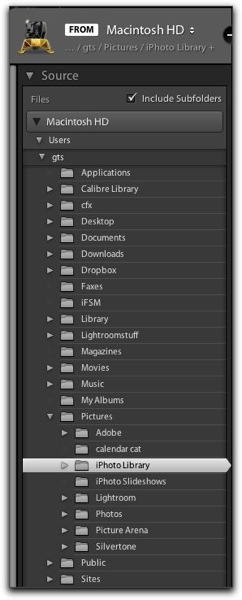
If you have Lightroom 3 or 4 accessing your iPhotos is really easy.
Just choose the iPhoto library in the import module in Lightroom 3 or 4 and check the Include Subfolder button! If you don't see the Include Subfolders check box. Click on the the IPhoto Library folder to open it…
Lightroom iphoto imp
 
(For Ralph)
When you open Lightroom, hold down the "alt"/option" key. 
 
make a new catalogue and save it to a folder on your New Hard Drive at the root, then open the Import Module in Lightroom.
(see above for step 1)
 
Choose the Move Option, 
Layout004


Set your Destination
Layout005


Set your file structure and Click Import!
 
 
The "Root" Of your New "Photo" Hard drive should look something like this
 
 
Layout006


Now go back to your Finder and look in the "Originals" and "Modified" folders…
 
Enjoy using Lightroom!


Friday, May 17, 2013

Lightroom Notes

Some Notes from Lightroom Class May 13

Transferring Photos from a PC formatted external hard drive to a Mac…

PC's use a file system called NTFS, Mac's use a different system… (HFS+)

1. Paragon Software has a solution NTFS for Mac® OS X 10

2. Seagate makes a driver for some of their "Go Flex" external drives

http://www.seagate.com/support/external-hard-drives/desktop-hard-drives/backup-plus-desk/ntfs-driver-for-mac-os-master-dl/

3. If want to tinker… OSX Snow Leopard and up can read/write NTFS  This site offers a widget to help the process NTFS Mounter

4. If you like to really tinker OSX Hints offered the following

 10.6: Enable native NTFS read/write support

Exporting Photos Via to your  Mac or PC mail client (Mac Mail or Outlook, Outlook Express, etc… )

Since there is a detailed "how to on line" excerpt from Scott Kelby's Lightroom Book

http://www.peachpit.com/articles/article.aspx?p=717555&seqNum=13


Enjoy


Tuesday, December 18, 2012

Fixing the Obvious, Skin Tones, and Smoothing Skin and where to from here

Week 8 Outline

Fixing the Obvious, Skin Tones, and Smoothing Skin 

I'm re-doing the Black & White resource page, adding a little bit about the history of the Black and White Photography and the different Dark Room Chemical processes and their results.

http://www.uofgts.com/PS-P2Site/bw.html  It'll change over the next few weeks…

I'm also re-building the following web page so, it'll be changing over the next few weeks… It's a list of tools in Camera Raw and Photoshop… 

 Remember, The class web site will always be available, and is always evolving…

Take another class… http://www.campusce.net/clark/course/course.aspx?catId=172


 So, Now what... 

I'm often asked… now that the classes are over, what do we do now?

Here are some suggestions...

Garry's Favorite web sites

  1. The Luminous Landscape
    1. http://luminous-landscape.com/whatsnew/
  2. http://www.dpreview.com/
  3. http://www.imaging-resource.com/news
  4. http://www.photographyblog.com/
  5. http://theonlinephotographer.typepad.com/the_online_photographer
  1. Join a forum and lurk!

    http://www.photoshopforums.com/

    http://forums.adobe.com/community/photoshop

    At some point someone will post a question… And you'll be able to provide them the answer!

There are lots of videos on the Adobe TV web site

http://tv.adobe.com/

LUMINOUS LANDSCAPE  has a bunch of video tutorials that they sell. Get them and their video Journal...

http://luminous-landscape.com/videos/download-videos.shtml

George Jardine has a terrrifics web site a a series of videos

http://mulita.com/blog/

One more thing
Don't be shy, Stay in touch and share your photographs!

and

Photograph, Photograph, Photograph!

Then in Lightroom & Photoshop

Practice! Practice! Practice!


Best  Wishes

Garry Stasiuk


Thursday, December 13, 2012

Black and White… and Prepping for Printing...

I'm working on a web page about the history of Black and White prints and the different processes

BlackandWhite

Stay Tuned

Before you Print or Publish to the web Soft Proof

Printing from CS6

Printing  setup in Photoshop  CS6 has changed… but, the procedure to get a print ready to print  hasn't.

The Basic rule here is:  You want Photoshop to manage the color NOT THE PRINTER!  You after all have done all of "that" photo enhancing and you want to see the colors you selected in the print!!

Read the following pdf file by Martin Evening…
Color management 

Ben Wilmore's Colormanagement Simplified is no longer available

To save you ink, paper and time you NEED to soft proof your images…

You'll need color profiles for YOUR  paper and printer.

Here's the steps 

If you have Lightroom 4.x Do your soft proofing in Lightroom, It's quicker and easier in Lightroom

Softproofing in Lightroom 4

Once you have made your "tweaks" to soft proof and image for a particular paper and printer, or output for the web as sRGB, you can apply those same adjustments to ALL the photos before they are printed.
 
Got a question?


Tuesday, December 4, 2012

The Pen Is Mightier than the Sword…

Last Class Review

NewImage
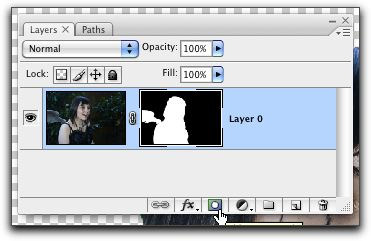
Just a reminder that there is a web page with complete step by step instructions on how to use the pen tool to create a selection and convert the selection to a mask.

You'll find details about the Pen Tool here…
http://uofgts.com/PS-P2Site/Pentool.html

The instructions go on and detail what you need to to do to "refine" the mask using the Refine Edge dialogue.
Click here to go to the Selection and Masking Tutorial


You can also make a selection based on color and convert that to a mask to edit with the Refine Edge Technology. http://uofgts.com/PS-P2Site/selectionbycolor.html


TIP

If you have a mask, you can always convert it to a selection, and back to a vector path.

How? If you have a mask, in a layer, right click the mask and choose "add mask to selection" or since Masks are stored in the Channels panel at the bottom of the panel there is a button named "Load Channel as a selection"

You can go one step further and convert the selection to a path, but, you MIGHT loose some data… In the Paths palette (panel) choose at the button at the bottom of the panel "Make work path from selection". The best strategy is to always save your Path with a unique name, you can always load that in the Paths Panel at any time.


 The Next Two Classes

Bring to class images that you would like to convert to Black & White, or split Tone. The class is partially about how to convert your images into Black and White. We'll also look at how to split tone images.
We will also be looking at techniques that used to belong to the realm of Photoshop, but can now be accomplished in Camera Raw.
In this class we will also begin to look at how to deal with "retouching" portraits, but concentrate on that during week 8's class. Bring to class a portrait that you'd like to work on...

It's Your Topic!

Bring a photo that is giving you grief and we'll collectively try to solve your problem… 

Fix it

Is there a technique or subject that hasn't been covered in class?  Send me an e-mail!

Is their a technique YOU developed that you'd like to share with the class?


Either leave a comment on the blog, or send me an e-mail. garry@uofgts.com
See you in class!

Homework!

Post some pics to the blog and share them with your class mates!