Monday, March 24, 2014

Lightroom -Last Class Review "Where to from here?"

Hope you enjoyed the class, and you had a wonderful Thanks giving… 

In the Last Class we worked on How to find the real picture in the photograph. using Cropping

http://uofgts.com/PS-P2Site/crop.html

So, Now what... 

Here are some other suggestions…

  • Take another class, At some point Clark will have a Photoshop for Photographers Class
Here are the links to Clark’s Registration
For
Take Better Photographs Part 1 and 2  January 10 and 24 (Saturday) All Day
 
A Photowalk February 28 (Saturday)  All Day
 
Photoshop for Photographers
Not available this winter term.
 

Garry's Favorite web sites

  1. The Luminous Landscape
    1. http://luminous-landscape.com/whatsnew/
  2. http://www.dpreview.com/
  3. http://www.imaging-resource.com/news
  4. http://www.photographyblog.com/
  5. http://theonlinephotographer.typepad.com/the_online_photographer
  1. Join a forum and lurk!

    http://www.photoshopforums.com/

    http://forums.adobe.com/community/photoshop

    At some point someone will post a question…  And you’ll be able to provide them the answer!  Pay it forward!

There are lots of videos on the Adobe TV web site

http://tv.adobe.com/

LUMINOUS LANDSCAPE  has a bunch of video tutorials that they sell. Get them and their video Journal...

http://luminous-landscape.com/videos/download-videos.shtml


And, Don’t forget the links to other reference material on the Class Lightroom Website Click the tab ‘Resources”

http://uofgts.com/Lightroom/index.html


One more thing
Don't be shy, Stay in touch and share your photographs!

and

Photograph, Photograph, Photograph!

Then in Lightroom & Photoshop

Practice! Practice! Practice!


Best  Wishes

Garry Stasiuk


Friday, March 14, 2014

Photographic Opportunity --Total Lunar Eclipse

Leclipse

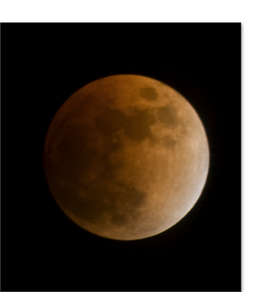
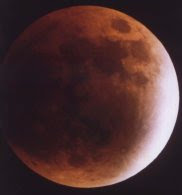
The photo at the left is a Total Lunar Eclipse I took with a Celestron 8, with a focal length of 2032 mm.

That eclipse was on September 6, 1979 The photo was taken Somewhere near Bull Run off of Larch Mountain Road in Oregon. Sky and Telescope editors thought the dark splotch on the left was “unusual”.

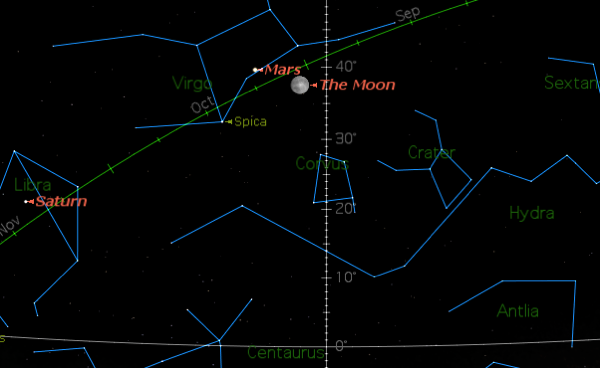
The up coming Total Lunar Eclipse on April 14-15, 2014 is well placed for a photographic opportunity in the Pacific Northwest

The Moon will be Almost Due South at the start of totality at 12:07am PDT.  The Moon will be 38 degrees above the Southern Horizon. Totality will end at 1:35 am PDT


This image is from “Starry Night” and shows the position of the moon at the beginning of totality as seen from Vancouver, WA…

Mars and Spica are nearby and Saturn is in the South East.


NewImage


The following table of eclipse times is from The April 2014 issue of Sky and Telescope


NewImage


Eclipse


Lunar Eclipse, February 20, 2008

This was taken with a Canon DSLR and a Sigma 70 - 300mm zoom lens.

Exposure data

f/5.6 1.6 of a second, ISO 400 f.l. 300mm

The image is well cropped…

Nice thing about a digital camera… you can see your results as you shoot…

You can see some of the 2008 eclipse photos  on my website…

I updated my Lunar Eclipse gallery on March 19 and included other eclipses…


http://www.uofgts.com/Lunareclipses/index.html


New noise reduction routines in Lightroom should improve the image quality…

I’ll work on that!


Sunday, March 9, 2014

Slideshows, Movies, Music and Books, Oh Boy!

In class we’ll focus on making a Book ( a requested topic) 

If you actually want to work along in class with your own images, You’ll need to do some prep work!

OUTPUT Prep:  Things you need to do First

  1. In the Library Module
    1. Put all your book/slideshow etc image files into a collection.
  2. At a bare Minimum, fill in he Metadata for each image with: Title, Caption, and Headline information.
  3. Sort (drag and drop) the images in the order you want them to appear in the book or slideshow
    1. You can sort image order in the Film Strip, but it is MUCH easier to do In the Library.
When you have done the above
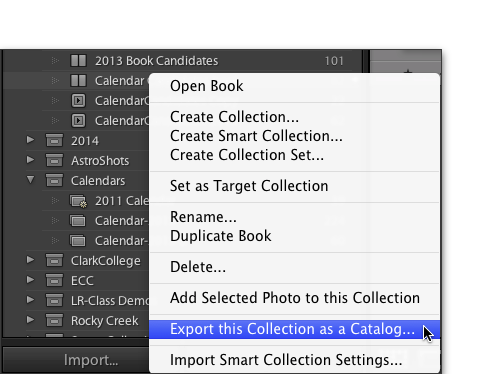
If just want to bring the “collection” to class, “Right (Control) click the Collection in the collection panel and choose “Export this Collection as a Catalog…” and save it to a flash drive.

If you want to try and follow my notes go a head and  Open your collection in the Book Module, click the Book Module Button 

Book catalogue


If you have been working on any of the “output” Modules, you can bring the work from that module as a collection.  When you click Create Saved Slideshow  or Book, Lightroom will save your work as a  special collection:  Book, Slideshow, Print or Web Collection!
You can export that specialty module and bring IT to class…


I’ve written out some notes on using the Slide show and Book Module.

The Book Module Notes 

Click on the Book Tab Book Module Notes


The Slideshow Module Notes

Click on the Slideshow Tab Slideshow Module Tab

Here’s a sample slideshow saved as a video.


USE of Music…

You can purchase “Royalty Free” Music or you can use music that is “Royalty Free” because they are being shared by the Artist for your use.

 The music is usually protected with a  “Creative Commons” Licensing or a similar type of agreement.

Try this web site

Free Music Archive

http://freemusicarchive.org

Music ranges from Classical to just plain weird.

The music in the video below is from the website MP3 2000

http://www.mp3-2000.net/song/canton-136-71-1-schvisen-633988


If you have time to burn, just do a Google search for Video production music… Most of the “Pay For” companies offer some “free” samples for your use… Average price for an unlimited license for a single tune is $9.00 or less…

See you in class! 

Compositing in Photoshop/Elements

Howdy

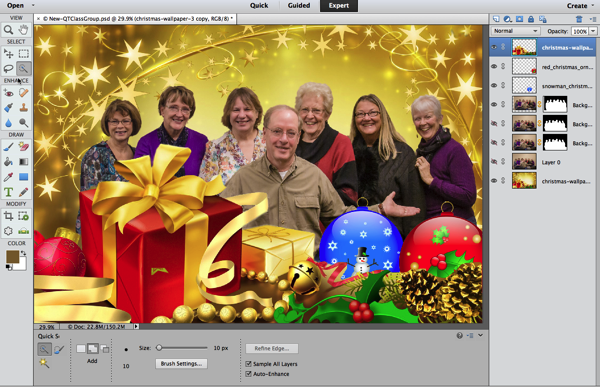
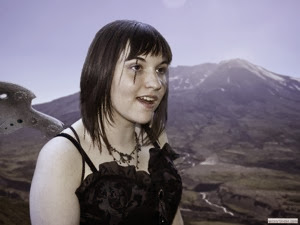
Sometimes you have a photograph of an individual, but the background is really distracting… So, you want to eliminate the background and add “something”.

The only way to do that is to make a composite image in Photoshop, PSElements or a Photoshop wanna  be program.

Below are some examples with links to detailed instructions on how to complete the project.

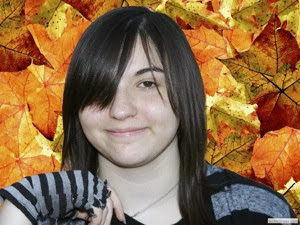
Sample 1: An e-card

Composited in Photoshop Elements, Using the Magic Extractor in Photoshop Elements

Quick Final


Sample #2: The Pen is mightier than the sword

For the following technique you’ll need to learn how to use Photoshop’s Pen Tool

and you’ll get results like this…

Making selections with the Pen Tool and refining the edges in Photoshop

SavanafinalLayermask


Yep, learning Photoshop is whole other class!


Thursday, March 6, 2014

Develop Module, Soft Proofing, Importing Presets, Using Presets, Work Flow From Camera to Catalogue, To Photoshop And Back. More on Workflow, Exporting Images, emphasis on Size. Tone Curves: Parametric Vs Point Curves, Point Curves: Linear, Medium Contrast, Strong Contrast…

Exporting your Photographs

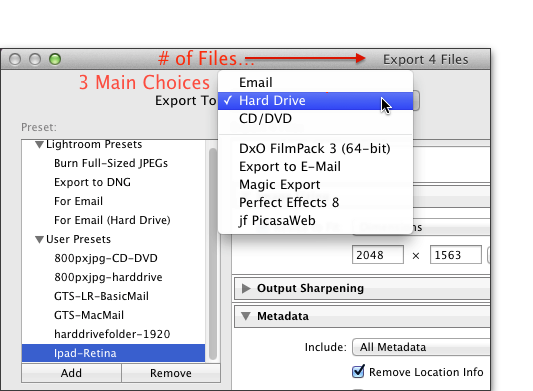
The question to ask yourself here is what are you going to do with the image file, where do you want to send your image files, and in which format (as a .jpg, .tiff, .png, .psd., raw enhanced, raw original)?

Export To:

Export1Where?  To an email, to a folder on a hard/flash drive, to a DVD/CD.
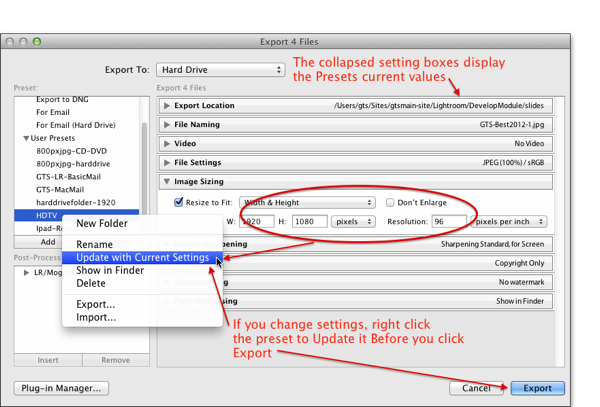
You make your choice in the Export To:  Drop Down Menus.  The Export to DNG and For Email (Hard Drive) menu choices give you some extra options.

In the example image I have added some “other” plug-ins to Lightroom, they are listed below the 3 standard Choices

You can find Export Plug-ins at the Adobe exchange (some are free some are Commercial), or just search the internet for Lightroom Export Plug-ins.


In the Preset Window you can choose default settings for:

  • Full Sized jpg’s,
  • for exporting as DNG files,
  • for email (Lightroom style) or
  • email but, also save images to a folder on a hard drive…
If you want to add a new setting, choose a preset, “single click” to highlight it, and click Add, name the new preset and click Create…
 
When you change the settings, right click on the newly created preset and choose “Update with current settings” 
as shown below… Be careful in filling out the values in a “box” if you press the return key the Export will immediately startup…

ExportSettings

.


See you in class…

There are other ways of “Exporting” your images.  You can make slideshows, books, Web Pages, and make prints.

You can also publish your images to other services

NewImage


Tuesday, March 4, 2014

Where do I put 3rd Party Presets?

This is actually trickier than it seems…
You have 2 choices…

By default, Lightroom will store Presets in a folder on your System Drive.  If your catalogue is NOT a default catalogue, but on a separate hard drive, AND If you start up your catalogue on another computer, the presets will NOT be available!
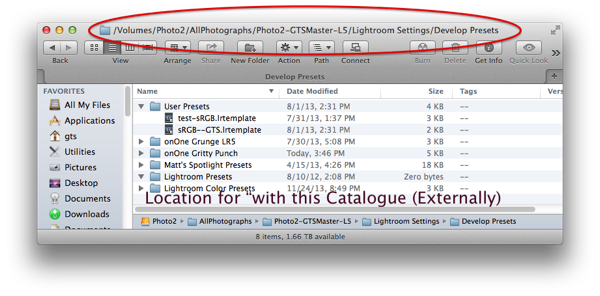
So, the second choice is to store you presets √ Store presets with “this” catalogue! “This” = to an external Hard drive (location).

Choice 1 : The Default…

Go to Lightroom: Preferences > Preset Tab


Clicking on the Show Lightroom Presets folder opens the above on a Mac
 and looks like this in Lightroom…
Defaultpresets


Choice 2: √ Store Presets with This Catalogue…

√ Check Store presets with This Catalogue


You will notice That to get to the Develop Presets folder I had to open Lightroom Settings folder, and then look for the Develop Prefs folder
ExternalFolder


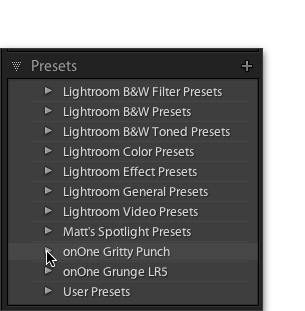
In Lightroom the presets look like this…
Externalpresets


Most downloadable presets come with installation docs
You know what to do, If all else fails?!!!


Question: What should I cover in class?

In no particular order this is the response:

Develop Module, Soft Proofing, Importing Presets, Using Presets, Work Flow From Camera to Catalogue, To Photoshop And Back. More on Workflow, Exporting Images, emphasis on Size. Tone Curves: Parametric Vs Point Curves, Point Curves: Linear, Medium Contrast, Strong Contrast…

Presets

There are lots of presets available for free, or purchase. 

Free Presets for Adobe® Lightroom® – onOne Software

100 Free Lightroom Presets (And How to Make Your Own) - Tuts+ Photography Article

8 Sites for Free Adobe Lightroom Presets - Digital Photography School

Don’t know what to do, to make your Photo “better”?  (#4 from Top 10 TYNTK  (Things you need to know (about Lightroom)… )

Is there a color in the scene/portrait that you "remember" photographing? Color of the flower, skin, sky, grass, leaves, trees... Make changes to make those colors appear on your monitor.Color doesn't work? Make a virtual copy and try a "Black & White" or spit tone the Photograph

Still Don’t know what to do?  Try a Lightroom Preset.
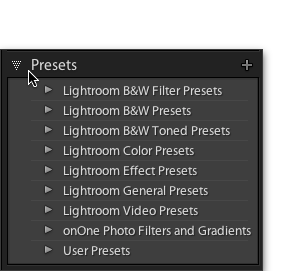
Lightroom is “Preset Happy”!  And come with some “Built-in” Presets…
Caveat:
Be careful when using presets…  

If you are trying out different presets, always remove/delete the preset, before applying a different one.  If you don’t more than likely you’ll wind up with “settings” being added from the previous preset. And you won’t get what was intended by the preset… 

  • Use Undo Keyboard Shortcut
  • Control + z (PC)
  • Command + z (Mac)

Presets are available in:

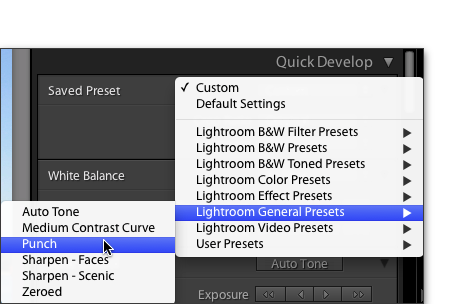
  • Importing and The Quick Develop panels
Importing… In the Apply During Import Panel 
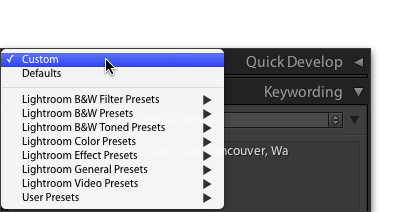
Quick Develop… 
If the Quick Develop panel is closed The Presets are available in the Panel’s top bar…
PanelClosedPanelopen


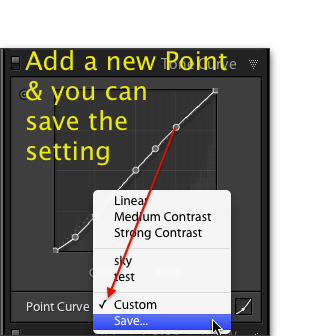
  • Tone Curve —-The POINT Tone Curve Panel
You can save a preset anytime you add a new point to the graph… But, remember the curves are unique to the image, especially if you are using TAT (Targeted Adjustment Tool)
 
PointCurve


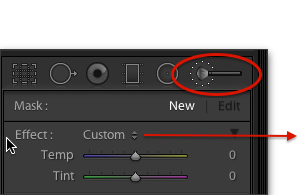
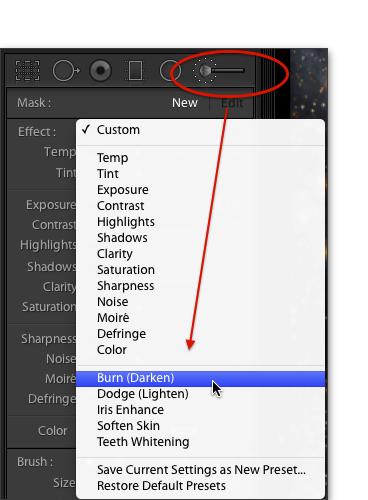
  • Tool Bar - The Adjustment Brush
DropDown


ToolBar AdjBrush


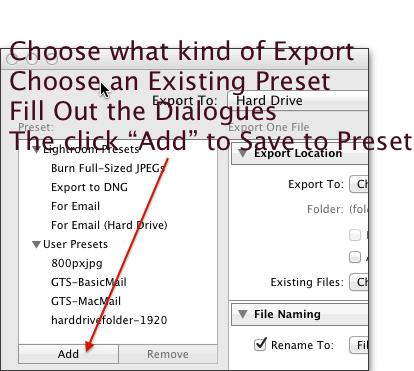
  • Export
To make a preset for Exporting your images, You need to choose Export To:  Email, Hard drive, or CD/DVD 
 
Then Choose an existing Lightroom Preset… 
Fill out the Dialogue Box   BUT!!!
 
BUT, Before you click the export button Click “Add” at the bottom of the Preset: Panel…
 
Export


  • Also templates for Printing, Web pages, (Web Templates and Galleries) 
Printing:  Lot’s available on the internet…
 
http://laurashoe.com/2013/06/24/great-lightroom-print-templates-for-free/
 
Web Template/Galleries
 
Here’s a free set from “The Turning Gate”
 
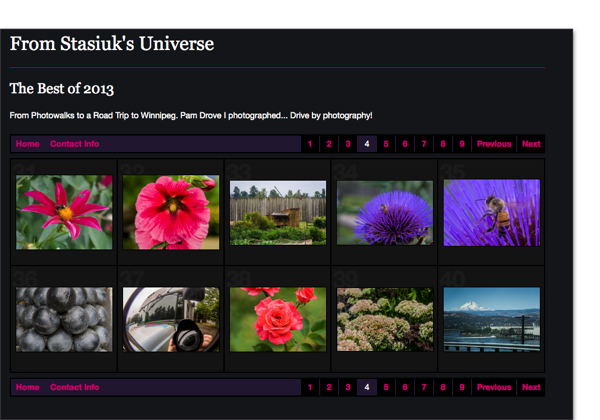
and, this is what one of the free HTML Galleries Looks Like…
 
Webpage