THe Art of Photography --Part 2
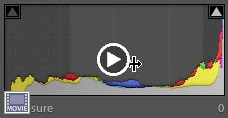
This is a movie of the Histogram in Lightroom. (It displays the same information as Photoshop and PS Elements...Except that it is interactive). Placing the cursor in the histogram shows you what area Recovery, Exposure, Fill Liight and Blacks are affected by the sliders, or in the case of Lightroom holding down the mouse and moving the cursor left or right inside the histogram changes the data!
Recovery = Highlights
Exposure = the full histogram
Fill Light = Shadows
Blacks = Blacks
In Lightroom the Clipping indicators change when you move the slider in one of the "areas" and the data shifts across a threshold.
In the case of a photo that is so overexposed or underexposed you set the exposure/recovery first, then you set your White Balance.
For Photos that are more accurately exposed, the first step is to set the White balance.
Remember in order to display the correct colors we need to know what's white, what's mid-gray and what's black
Next... Mid-gray
 |
| From 2011-02-02 |
Recovery = Highlights
Exposure = the full histogram
Fill Light = Shadows
Blacks = Blacks
In Lightroom the Clipping indicators change when you move the slider in one of the "areas" and the data shifts across a threshold.
In the case of a photo that is so overexposed or underexposed you set the exposure/recovery first, then you set your White Balance.
For Photos that are more accurately exposed, the first step is to set the White balance.
Remember in order to display the correct colors we need to know what's white, what's mid-gray and what's black
Next... Mid-gray
No comments:
Post a Comment