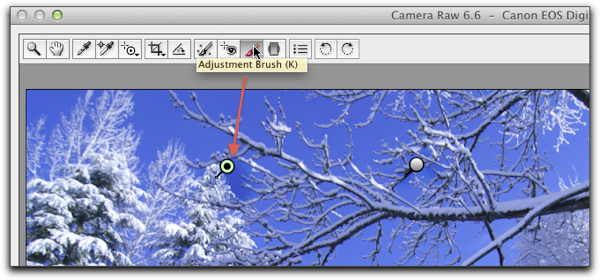
The Camera Raw Adjustment Brush
 Want to undo what you just brushed?
Undo (Unlimited???? )
Command Z (Mac)
Control Z (PC)
What to delete what you did all together?
Click on the "pin" to highlight it and then,
yep, press the delete key!
Delete (Mac)
Backspace (PC)
Editing Actions...
I found a tutorial that explains how to edit Photoshop Panel Actions in detail…
The web site is called Photoshop Essentials
The link takes you to page 9, of a 17 page tutorial… Pages 9 through 12 should answer any questions you might have
http://www.photoshopessentials.com/basics/photoshop-actions/page-9.php
In summary here's what you need to know
Step1
Open the Action Panel
Menu
Window > Actions
Step 2
Load the action you want to edit or locate it in the list. We want to make a copy of it, but first we need to make a folder for the action.

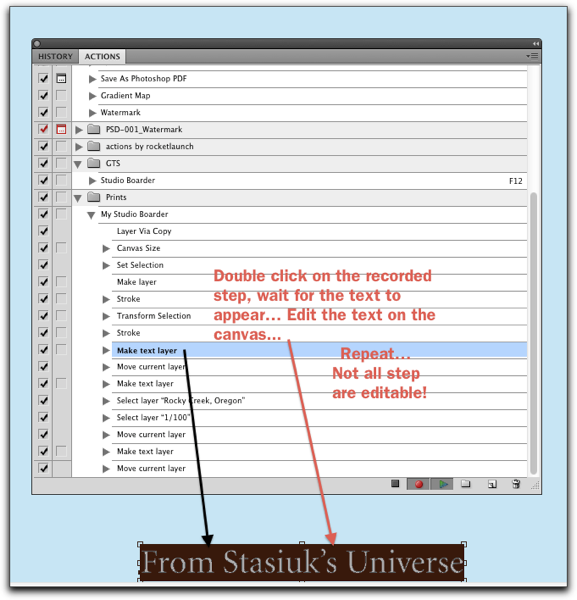
Most steps in an action can be edited… In the GTS Studio Print Action You'll want to edit the text, maybe the stroke...
Just double click the step… wait a bit… either a requester will popup or you can make edits right on the canvas. See the Text Tool Example below.

But, what if a step isn't editable? Just delete the step and re-record it!
Or, just make yourself a new action… Practice what you want to do… write the steps down...
and Camera! Lights! Action!
Here's the steps I recorded for the Studio Print
Step 1.
Duplicate your picture
(pc) (Control + J) (Mac) (Command + J)
Optional Step
Select an Adjustment layer like "Levels" or "Hue & Saturation or "Black and White" to change the photo an arty Sepia, duotone or Black and White!
Step 2.
Add white space around the photo.
PhotoShop: Menu: Image > Canvas Size
PSE: Menu: Image > Resize > Canvas...
Choose relative and 2 inches, 2 inches
Click OKAY
Step 3.
In the duplicate layer on the thumbnail of the photo
Press the (PC) Control key + click (left) mouse once
Press the (Mac) Command key + click the mouse once
this will put a selection around the photograph.
Step 4.
Create a new blank layer
Step 5.
Go to the Menu: Edit > stroke
choose 1 pixel (I like at least 4 pixels) and set the color (Black)(I like mid-gray) in the color swatch button
location, choose center.
Step 6.
Click Okay (You can change opacity if you wish)
Step 7.
Go to
menu Select/Transform
In the tool bar change 100% width to 102% and 100% height to 103% Click the check mark
Step 8.
Go to
Menu: Edit > Stroke
Choose 1 pixel (I like 4 pixels) and change the color to black (I like a mid - gray) Click Okay
Step 9.
Use the type tool (Tool Bar), use a 36 pt fancy font Script like Minion or Trajan for the title "Yourname Studio"
N.B.
If you run this "action" and if you don't have any of the indicated fonts, Photoshop will substitute the "default" font.
Step 10.
use a written font like Hand Writing Dakota for the Number of the print (1 / 100) at the bottom left and your name at bottom right

Have fun!
 Want to undo what you just brushed?

